I don’t even know how or when I started making this recipe, but I whipped it up one time for my parents back in my single days, and it’s been a hit in my family ever since. My kids even love these enchiladas, and that’s saying a lot right there. The recipe has been adapted a little bit over the years here and there – sometimes rice and/or refried beans will be added – but for the most part it stays pretty basic. I hope you love it as much as we do.
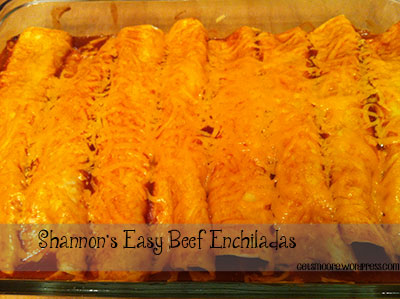
Shannon’s Easy Beef Enchiladas
Ingredients:
-
1 pound ground beef
-
-
1 onion, chopped
-
1 pack soft taco size flour tortillas
- 1 cup of water (for taco seasoning)
-
2 cups chredded cheddar cheese (I prefer Sharp)
-
2-3 small cans or 1 large can Old El Paso Red Enchilada Sauce (my fave) – amount depends on how saucy you like your enchiladas
– Brown ground beef with onion until cooked through. Mix in taco seasoning and about a cup of water and simmer until water is cooked off. Remove from heat.
– Pour about 1/4 cup enchilada sauce in bottom of greased baking dish and spread around. I usually use a 9×13 glass dish.
– Place one tortilla on a plate, and spread about a teaspoon of sauce around entire tortilla. Scoop seasoned meat and onion mixture on tortilla, then sprinkle with cheese. Roll, and place seam down in pan.
– Continue with the rest of tortillas until you either run out of meat or space in the pan.- Pour remaining sauce over enchiladas, making sure all of them are covered. I also like to make sure the sauce gets down in between the enchiladas – if they’re packed tightly in the pan, I just scooch (technical term) them aside a bit as I pour the sauce. Use your judgement on the amount of sauce; I like mine saucy.
– If you’re freezing the enchiladas to cook later, STOP HERE. Cover the pan in foil, then wrap in foil again. If you’re using a smaller pan, like an 8×8 foil pan, cover in foil, then slip into a freezer bag. Make sure you mark the package somehow that it’s Enchiladas. No one likes a mystery pack in the freezer! When you’re ready to bake the enchiladas, thaw, remove foil, then continue the steps below.
– Top entire dish with shredded cheese according to your taste. We love cheese in this house, so I usually use a full 2 cups on the top.
– Bake at 375 for about 25 minutes or until it’s nice and bubbly and the cheese on top is melted. Tip: If you like crispy, or slightly burnt cheese, leave them in a bit longer. We happily discovered this one time when using an unfamiliar oven timer.
Dig in and enjoy!
The great thing about this recipe is that it’s easy to adapt to your tastes. The measurements aren’t exact; use as much or as little sauce and cheese as you like. Add more vegetables, use chicken or turkey instead of ground beef if you like.
If you try it, I’d love to hear what you think!


