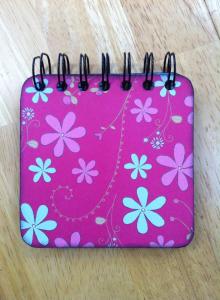
I love papercrafting. I haven’t done much of it lately because I’ve been so wrapped up in the world of vinyl personalization (need a decal?), but today I was so happy to get my fingers dirty again. I love playing with paper! I have so much scrapbooking paper, you might say I’m a hoarder. It’s probably nothing compared to what others might have, but I feel like it’s a ton.
Today I finally completed something I’ve wanted to do for a while: a snazzy cover for one of my many Sticky Note Pads (yes, Post-Its). I also used a tool that I’ve had for a while, but haven’t used much: The Cinch from We R Memory Keepers. Actually, I think the main reason I bought the Cinch was to make these sticky note covers. The Cinch is a bookbinding tool that’s pretty much just awesome. You can use wire coil binding or spiral binding to bind together books or papers, or even chipboard coasters. It punches the holes (round holes, no less, unlike some similar tools), lines up your coil and materials, then presses together the coil. Fast and easy!
I started with 2 coasters that I stole borrowed from a restaurant that are 4 inches square.
Then, I ran the coaster through my Xyron machine to make one side sticky. You can also use a glue stick or a tape runner; whatever you have on hand is fine.

Put the sticky side down on the bottom of your scrapbook paper, and trim closely around it with a sharp craft knife.
I need to change the blade on my knife; it took a few swipes to cut through the paper.
Once the paper is trimmed, run the coaster through the Xyron again, to make the other side sticky. Trim the paper from the other side. (I used two-sided paper on this project, in case you’re confused – kitchen tools on one side, and the blue/yellow/green stripes on the other)
Repeat with other coaster.

Once the paper was adhered, I used a fine grit sanding paper to smooth out the edges on the coasters, and to clean them up a bit.
Next, I used my distress ink and a sponge to darken the edges.
When the ink was dry, I was finally ready to break out The Cinch! I lined it all up and punched 7 holes at the top.
I used 3/4 inch Book Binding Wires to bind it all together…
…and voila! My snazzy sticky note cover was done. I’m so happy with how it turned out; I can’t wait to make more!
Give it a try! My daughter immediately claimed the pink book, so I made the cooking book for myself. Enjoy!


